Friday, April 16, 2010

Candlesticks

Adorable Michelle at Someday Crafts is having a Categorically Crafting party today - and the theme is candlesticks!
Since I LOVE candles (and their sticks, of course) I had to join in.

First up - this hideous find.

The strange marble-looking portion of this candlestick is...well, I'm not sure what. Not marble, that's for sure.
Easy fix on this - black spray paint hides a multitude of sins.


Next up -
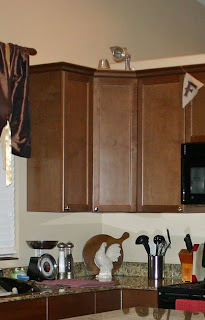
Here is a strange before picture. I had a day of crafting planned, so I threw every item I thought I might use on the counter and took a picture of them.  This was NOT being a good blogger. This was a bad idea. Unfortunately, it's the only "before" type picture I have.
So - notice the 3 arrows.

3 random pieces of junk. An ugly metal candlestick from the dollar store, a .50 piece of unfinished wood (mostly hidden in this picture) and a .75 jar from the thrift store.
Paint and glue and a candle later - here she is!


Last, is another creation from the objects in the "before photo"
New arrows this time.

Another .50 piece of unfinished wood from the craft store and a .75 weird wooden...bowl...type...thing.
Glued together and lightly brushed with creamy beige -

My favorite after.

For more candle projects from me, you can check out these posts,
Pottery Barn Cadlesticks and Useless (budget) Decor

For more candlestick projects that are NOT from me, check out the Someday Crafts Candlestick Party :)

Thursday, April 15, 2010

The rest of my Spring

I never got around to posting pictures of my Valentines decor, and I hated myself for it.
Seasonal decorating is one of the great joys of my life. That's just how it is. I'm tempted to call that "sad", but I'm going to try to embrace it, instead.

Anyway, I didn't want to miss out on sharing another round of photos, so here they are.

I've already shown you the entry way table, but here's another picture - just because I love the way it turned out :)

First, the front room.
This is the bench underneath the window.
I threw my sister a baby shower last Summer and the theme was "Nesting"
I painted all these darling birdhouses for decorations. Spring seemed like the perfect time to reuse them :)


This is the coffee table.

I picked this giant birdhouse up for just $3 at the thrift store, and all it needed was some cleaning.
 

The mercury glass bird came from Target. I got it on extreme clearance because the tail is broken. I think it's pretty impossible to tell, and I know it's there!

This is the console table in my family room


This is the shelf in my hallway - love the way Spring looks on it! I was so tired of Winter decor.

And here's my dining area. I saved the best for last :)
The table

I finally sewed the ruffled edge burlap table runner I've been dreaming about. And I love it. I washed the burlap before I used it, then I lined it with canvas, it feels very substantial. Plus, it's so girly looking!


The pretty rose dishes are just girly enough to match :)

The centerpiece is one of my favorite things...
Another thrift store lazy susan, painted and distressed, is the base. The candle holder is made up of some strange wooden parts I found at the thrift store and glued together. The rocks are actual stones that I found in my yard and hot glued moss to. The nest was cheap from the craft store. The egg I already had :)


The buffet


I tucked some artificial flowering branches in with the real ones my husband pruned off our tree last summer :)


Tuesday, April 13, 2010

Custom Cabinets, part deux!


Glass cabinet fronts!
Everyone loves them, right? I know I always swoon when I see them. Those kitchen full of of gleaming, open looking cabinetry with artfully arranged dishes and decor...
Love them.

No way was I going to be able to convert every cab in my kitchen to glass fronts - too much junk to hide! But all those Kitchen Design magazines that I keep mentioning showed me that it's okay to have just a couple glass fronts - it adds to that "custom cabinet" look.

So I converted just two of my cabs.
First was this stand-alone double door unit.
(Don't worry - I'm getting rid of those vinegar bottles, too. They are SO dated!)

I started by removing the doors, and taking all the dishes out.

Then I cut beadboard to fit (two pieces because I didn't have one that was large enough) and painted it green.

Once the beadboard was dry and installed, I began work on the doors themselves.

My sweet hubby helped with this part. I did the first one all alone - then handed the jigsaw off to him and let him do the rest. It's heavy!  He routered out a channel for the glass to sit in, too.
While he cut out the center panel I artfully arranged the dishes :)

Eventually (it took more than a week!) I got the glass cut to size and installed. I used a clear liquid nails product that promised to hold glass.  This is how it turned out.

Beautiful, right?
I was nervous about the glass at first, but they've been in for about 2 months, now, and it's been problem-free :) We are much more careful about how we close the cabinet doors now, though - no flinging them shut as we walk across the kitchen!

Love them <3

I also installed glass in the corner cabinet.
(before)

I have a bit of an obsession with tea pots.  So I decided to display them.

First I had to make sure everything was neat and tidy. I found a hemp basket in my craft supplies, holding fat quarters, and appropriated it for teas.

It wasn't big enough to hold all of them, so I used a brown paper bag, too. Stamped it with fleur de li's and replaced the handle with a gold ribbon - pretty :)

That took care of 2 tea-pot-back-drops.
For the 3rd I just a bunch of non-display-worthy tea pots in neutral colors.

For the 4th, I cut a piece of beadboard. I left it white because I wanted it to be non-obtrusive. It slips in easily and it's impossible to see from almost any angle. Behind it hides hot chocolate mix, protein shake powder, plastic straws...

Here are the afters of the corner cabinet.


I love the way these turned out. Doing just two cabinets let me arrange things so they look pretty, without giving up the storage space that hidden cabinets provide - because, let's face it - it you can fit a lot more in when you have no regard to appearance! :)

Linking up again this week!
@ ASPTL for DIY Day :)
@ The Shabby Chic Cottage for Transformation Thursday

Tuesday, April 6, 2010

PB Side Table Knock Off

After :)


I had this table in my family room that was hideously ugly.
So ugly, in fact, I don't have a before picture of it.
But I did find this one. It was the background of a picture that's about 3 years old.  Many, many things in my house have changed since then - but it at least gives you an idea of where I started.

This is a side table that Pottery Barn sells for $200

I love it, but (as usual) their price is a little rich for my blood.
So I watched my local online classifieds and I kept an eye out at the thrift store, and eventually I found a pair of round tables that I thought would work nicely. I offered $35 for the 2 of them.
Then my boy and I took a little road trip and drove for over an hour to pick them up.  We met our sellers in the parking lot of a grocery store near their home. While we were there we went inside to go potty and buy some snacks for the ride home. I ate my first twinkie in over a decade. It was my boys first twinkie EVER. It's a day we'll always remember. Maybe.

Anyway, I got my little tables and I brought them home, and then I started sanding.

I decided only to work on one, for now. I'm sure I have a perfect place for table #2, so I'm going to hold off on the makeover until I find it :)

When I had sanded it sufficiently (and removed that strange little brass thing)

I gave it several light coats of Heirloom White.
One that was all dry I brought the table inside (since it's COLD here!) Then I gave it a light sanding to smooth the finish out. Notice the dust on the floor.

Then I gave it a couple more coats of paint - a Behr color that matches Heirloom White exactly.


I think it turned out beautifully! And the total cost was no more than $20 - just a tenth of PBs table :)


Linking up to all my favorite blog parties for the first time in WEEKS!

P.S. I promise to put up a kitchen post this week - I know I've been a major slacker lately!