Showing posts with label built from scratch. Show all posts

Thursday, January 7, 2010

Wooden Box

I can't remember if I've mentioned this before...
When my Pottery Barn catalog comes it's like an event.  I secret it away until I have an hour to look through it. Then I sit down, armed with a pen and a pad of post-it notes, to pour through it. I usually come away with about 1/2 the pages folded down, items circles and notes written (on the post-it's) on those pages.
To be honest, this is actually a bit embarassing.
People think I'm creative. They have no idea that I'm just a big PB copy cat.  Am I the only one in the state receiving their catalog?

Anyway - this was the picture on one of the pages I marked in the fall catalog.


This is what I saw.


I circled it and wrote a post-it note that said "Love these boxes for beer - Christmas for guys?"

I forgot about them until about a week and a half before Christmas, when I was stressing about what to get for my BIL.  That night, I dreamed about the box.
I kid you not.
In the morning I woke up with the picture in my head. I tore through my winter catalog first, then found it in the fall catalog. I had to see the picture...to verify that this wasn't something I had actually thought up on my own.

Then I got to work building the box.
I made 2 before Christmas.  We filled them both with an assortment of expensive beer. One was for my BIL, the other we took to a friend gift exchange, where (I'm proud to say) it was very popular and was actually fought over.  I know that was probably due to the beer, not my box, but it still made me happy.

I really wanted one for my own coffee table, though, and Whitney and Ashley's "I made it without my hubby" party at Shanty2Chic was the perfect excuse.
I built this box last night, finished it this morning.  Just so I could post about it :)

Here's the how-to...

Materials -
a 1x4 (I bought the shortest length and had some left over)
Plywood (for the first two I used leftover pieces, for this one I bought some luan plywood.)
You'll also need a hammer and nails. Optional items include a distressing tool, stain and glue.

For the first box I laid out my beers and measured around them.
Now I know exactly what to cut the wood to, so I'll share :)
Cut the 1x4 into 3 pieces at 10 3/4 inches and 2 pieces at 8 1/2 inches.
Your plywood should be cut to 12 1/4 x 8 1/2.


You're going to cut a few more small pieces later, but those will have to be measured individually.

I wanted the boxes to have a kind of beat-up, aged appearance, so I distressed them with my hammer and this tool...which I use for all distressing. I don't have any idea what it actually is, though. My husband dug it out of the toolbox in the back of his truck months ago when I told him what I needed. I commandeered it :)


Then I mixed wood stain and paint into my paint glaze until it was an old grey-brown looking color. Wiped on, wiped off (making sure to get extra into all my distressed areas!) and my wood was instantly aged!


I used Quick Grip (my favorite glue) to put the outside of the box together and gave it about an hour to set. Then I attached the bottom with glue, too.


Once it's all dry you can put the center piece in. Make sure to measure so you get it nice and centered.  I glue this in (to the bottom) as well.


For the small divider pieces measure individually. Mine measured between 2 7/8 and 3 3/8.
Those pieces get the glaze treatment, too.
 

Once everything is thoroughly dry I nailed it all together.  First the outside box - 2 at each corner, 1 at each end where the centerpiece attaches, and one on each of the 4 bottom corners.
The little divider pieces go in now - measure to make sure your squares are equal - and nail them in from the sides.


Originally I thought I'd use two longer pieces of 1x4 (notched) to cross the center piece, but that seemed really difficult and is definitely NOT something I could do without my hubby.
That's sort of imperative around here - partially because he works a lot, but mostly because I don't wait well.

Anyway - here's the finished project!


I love it :)
Here it is on my coffee table


and...


I'll be linking up to the "I made it without my hubby" party at Shanty2Chic! Go see what some more independent women have done!
Also linking up to Transformation Thursday at the Shabby Chic Cottage!


Monday, October 5, 2009

Porch Bench

The same week I built the bench for my dining room table Kim, over at NewlyWoodwards, built one for her front porch.  Well, actually, her husband Ryan built it.  I loved the style and the idea so much that I told her right then I might have to steal it.  She clarified that I wanted to steal the BENCH – not her husband – and gave me permission.
Kim’s bench is SO sweet. It looks adorable with all her pretty fall decor arranged on it.


I wanted one bad, but I kept putting it off, thinking I’d have to build it from scratch like she did.
Then one day I remembered this mess that I bought at a yard sale a few weeks ago.


Seriously – is that not the ugliest thing you’ve ever seen? I only paid $3 for it, but I couldn’t figure out EVEN THEN why I was buying it. Take a good look, ladies, and remember this next time you whip out the craft paint because THIS is what can happen when you get carried away. Every bit of this thing – NOT just the stenciling – was painted with craft paint (which at least made it easy to sand off!)  Matt – who never says anything about all the junk I bring home – was horrified. I told him it would be fantastic when I was done with it. 
The gross little thing sat in my garage for a few weeks, sanded and primed (because I couldn’t stand to look at the grapes and ivy leaves for ONE MORE SECOND) while I thought and thought about what she might become. I rejected several ideas before remembering the porch bench.
One weekend I showed Matt Kim’s Bench Post and asked him if he thought we could use the mess as a starting point. I’d already purchased the MDF to use for the top.
He got right on it – ripping apart the old bench and using it as the sides to the new one.


Then he cut the MDF for the top (to my specs, of course) built a box out of 2x4’s and attached it, evened out the bottom of the sides (so it wouldn’t wobble) and assembled the whole thing.


AND he looked cute while doing it!


Let’s zoom in on the part I like best…


ANYWAY…once he was done I primed it (grey) and painted it (black) and let her dry in the garage.


Then I moved her to her new home on the porch and gave her some decorations.


Pretty, huh?


If you love the “Autumn” sign (I’ll admit that I do – even though I’m the one that made it!) you can read all about making it here - it was super EASY and lots of FUN :)

Monday, September 28, 2009

Ghost Tree


I live on top of a mountain that is covered in a tree that we call Scrub Oak.
I wiki'd that term and found that it's kind of a blanket name given to several varieties of 'shrubby oak' - not some special tree that is only found here in Utah. Damn.

Anyway, these tree's are twisty and knotty and have very thin trunks. They don't get tall - instead they spread wide. Clumps of them cover everything.
Personally, I'd love to have them in my yard, they are so natural feeling! but they were bulldozed when my house was built. Which makes me feel sort of awful.
Anyway, some of my neighbors have them in their yard, and many of them have removed them. Didn't work with the landscaping, I suppose.
A house around the corner from me had 4 of them laying on their curb, dead and twisty and absolutely perfect for a Halloween Tree.

I mentioned it to the husband.
"I really want to take one of those tree's and make a Halloween thing with it..." I wheedled, nonchalantly.
Must have been too nonchalant. It didn't work. He ignored me. A week passed, then two.
Finally, I stopped on my way home from dropping the girl off at school, lowered my tailgate and threw the dead tree in.

At home I sprayed it off with the "jet" setting on my hose and let it lay on the lawn to dry. Then I sprayed it down with black spray paint.
After it was painted i used a hacksaw to cut the roots at the bottom off.
Oh, and next time I will cut the roots off BEFORE I paint - because I was covered in black spray paint afterwards.

I took all the dead flowers out of one of the large pots on my front steps, and jammed the tree in as far as it would go.

Then I made 4 cute little ghosties out of wooden craft balls and white quilters cotton.


(easiest thing ever - I just put little white hair elastics around their necks.)

I drew faces on with a sharpie.
One is happy, one is sad, two are surprised, or confused or...something.

Lastly, I took the piece of 1x4 I had left from the coat hook mirror and cut it in two - giving them both angled cuts to help them look more Halloween-y and spray painted them with Rustoleum Paprika. Then I made them say "Boo" and "Eek" and added some cutesy to them.

I love the way it turned out!

Tuesday, September 22, 2009

Coat Hook Mirror

You've seen these everywhere, right?

This one is from Target. It's called a "Pub Mirror" and it's $75.
Target's usually my go-to store for cute decorative items that cost a small fortune at the really fun stores like Pottery Barn or Pier One...
But $75 was too rich for my blood!

I had this all in my house - just across from the laundry room/garage entrance and it REALLY need something.

A coat hook mirror sounded perfect - especially since I obsessively check my teeth before I leave the house.

So I decided to make my own!
Here she is - turned out pretty cute, huh?

If you want to know how I did it, here's a quick tutorial.

I started with a $5 door mirror from target, a 1x4 and a 1x2 from the Home Depot (less than $3 for both pieces of wood) a can of Canyon Black Rustoleum spray paint and 5 hooks - also from the Home Depot.

The boards were to frame the mirror.
I cut the 1x2 into three pieces - two short ones for the sides (mine were about 13") and one long one for the top (mine was about 59 inches.)
I cut the 1x4 to fit along the bottom.
Then I sanded them and gave them a couple of coats of spray paint.

When the boards were dry I screwed the hooks into the 1x4. I eyeballed where I wanted the two end ones to be, then I measured to make sure the ones in between were evenly spaced.

Hubby picked the hooks up for me one night on his way home from work.
This is one of the things I love most about him.
I have called him and asked him to pick up the most random things for me on his way home...
lumber, paint, hardware, even sewing notions. He always says okay - asks just enough follow up questions to make sure he buys the right thing - and NEVER, EVER, EVER wants to know what it's for, what I'm doing now or how much "help" he's going to be required to give.
When he gets home he lets me show off whatever project I'm working on and acts excited about it. LOVE HIM.

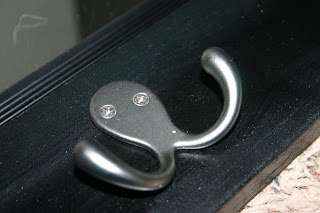
Anyway, these are the hooks he chose and they are perfect. They were probably a bit more than I would have spent myself - but then again, he made sure they matched the rest of the hardware in the house (brushed silver) without me having to paint them - which was nice for a change. I think he spent $4 per hook, and he bought 5.

At this point I lay the mirror and it's frame out on the floor and realized I would need something to mount the whole thing on so that I could hang it on the wall. Duh.
Luckily I had a fairly large sheet of hardboard in the garage that was left over from the race track we built for the boys Birthday last month.
We cut it to size and mounted the mirror and frame using adhesive. Then we weighted it and let it dry overnight.
The next morning I covered the mirror with newspaper and blue table, removed the hooks and gave the whole thing one last coat of spray paint (the black of the mirror frame was not the same black as my wood frame.)
Once it was dry I put the hooks back on and used my staple gun to attatch wire to the back for hanging.


Here she is, hanging on the wall in all her glory!


Total cost:
Mirror - $5
Lumber - $3
Hooks - $20
Less than $30 TOTAL!

I already had the hardboard and the spray paint, but even if you had to buy those things they would be less than $10. Hardboard is CHEAP and one of my new favorite crafting staples :)

Related Posts with Thumbnails