Glass cabinet fronts!
Everyone loves them, right? I know I always swoon when I see them. Those kitchen full of of gleaming, open looking cabinetry with artfully arranged dishes and decor...
Love them.
No way was I going to be able to convert every cab in my kitchen to glass fronts - too much junk to hide! But all those Kitchen Design magazines that I keep mentioning showed me that it's okay to have just a couple glass fronts - it adds to that "custom cabinet" look.
So I converted just two of my cabs.
First was this stand-alone double door unit.
(Don't worry - I'm getting rid of those vinegar bottles, too. They are SO dated!)
I started by removing the doors, and taking all the dishes out.
Then I cut beadboard to fit (two pieces because I didn't have one that was large enough) and painted it green.
Once the beadboard was dry and installed, I began work on the doors themselves.
My sweet hubby helped with this part. I did the first one all alone - then handed the jigsaw off to him and let him do the rest. It's heavy! He routered out a channel for the glass to sit in, too.
While he cut out the center panel I artfully arranged the dishes :)
Eventually (it took more than a week!) I got the glass cut to size and installed. I used a clear liquid nails product that promised to hold glass. This is how it turned out.
Beautiful, right?
I was nervous about the glass at first, but they've been in for about 2 months, now, and it's been problem-free :) We are much more careful about how we close the cabinet doors now, though - no flinging them shut as we walk across the kitchen!
Love them <3
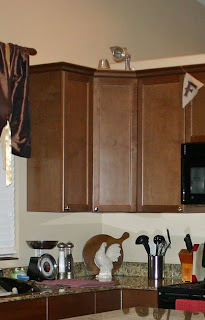
I also installed glass in the corner cabinet.
(before)
I have a bit of an obsession with tea pots. So I decided to display them.
First I had to make sure everything was neat and tidy. I found a hemp basket in my craft supplies, holding fat quarters, and appropriated it for teas.
It wasn't big enough to hold all of them, so I used a brown paper bag, too. Stamped it with fleur de li's and replaced the handle with a gold ribbon - pretty :)
That took care of 2 tea-pot-back-drops.
For the 3rd I just a bunch of non-display-worthy tea pots in neutral colors.
For the 4th, I cut a piece of beadboard. I left it white because I wanted it to be non-obtrusive. It slips in easily and it's impossible to see from almost any angle. Behind it hides hot chocolate mix, protein shake powder, plastic straws...
Here are the afters of the corner cabinet.
I love the way these turned out. Doing just two cabinets let me arrange things so they look pretty, without giving up the storage space that hidden cabinets provide - because, let's face it - it you can fit a lot more in when you have no regard to appearance! :)
Linking up again this week!
@ ASPTL for DIY Day :)
@ The Shabby Chic Cottage for Transformation Thursday


.JPG)

.JPG)
.JPG)
.JPG)

.JPG)
.JPG)






14 comments:
Love the inside beadboard, looks great!
Love the glass doors and pretty green beadboard! The teapots look awesome and that was a great cabinet to use in that manner.
love the beadboard idea!
Great job,
Alyssa
lifeoflyssie.com
What a great job!
So cute, you did a great job!!
Looks great Mandy!!
Great job!!
Your kitchen is looking amazing and "custom." Awesome job!
So, here's a couple of ideas to help you get started. The following steps are helpful to learn how to draw Manga: first thing that is important to know about drawing, is that a person must have a have basic knowledge of human anatomy. It won’t look to lengthy if there is plenty of white space between each thought.
Feel free to surf to my site :: how to draw anime
Hi there, I check your new stuff regularly. Your story-telling
style is witty, keep it up!
My webpage - asthma attack symptoms in children
Nice answer back in return of this issue with genuine arguments and
telling everything regarding that.
Feel free to surf to my blog post; health insurance one
Another available treatment option that can be done at home without a prescription is
a topical ointment. Fortunately, there are a variety of skin tag
removal treatments you can use. There are many different
reasons that could lead to the development of these tags on
the skin.
Look into my page ... where do skin tags come from
Hi colleagues, its impressive piece of writing concerning teachingand completely explained,
keep it up all the time.
Look at my webpage best allergy medicine for toddlers - http://bestallergymedicinehq.org/ -
Thanks very interesting blog!
Have a look at my blog post micheal myers ()
Post a Comment